


All Products
-
Surveying Reflector Prism
-
Survey Mini Prism
-
360 Degree Prism
-
Total Station Prism
-
Prism Pole Bipod
-
Carbon Fibre Telescopic Pole
-
Telescopic Levelling Staff
-
Tribrach Adaptor
-
Instrument Tripods
-
Total Station Batteries
-
Total Station Battery Charger
-
Total Station Cable
-
Total Station Accessories
-
Surveying Instrument
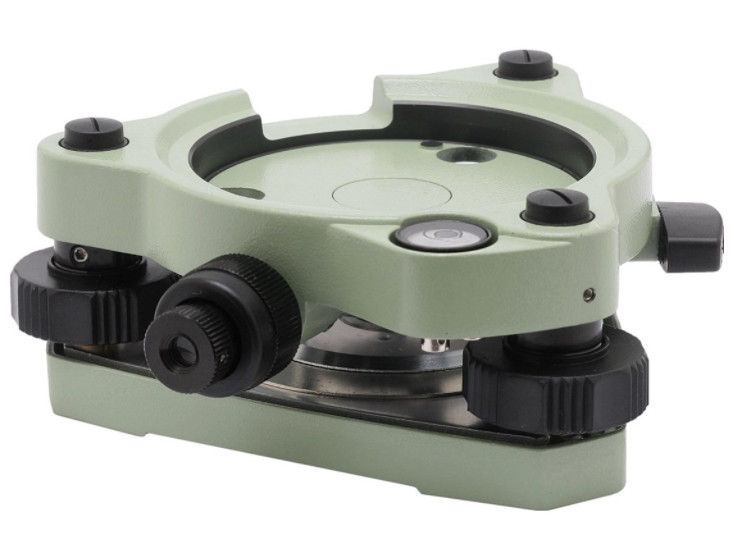
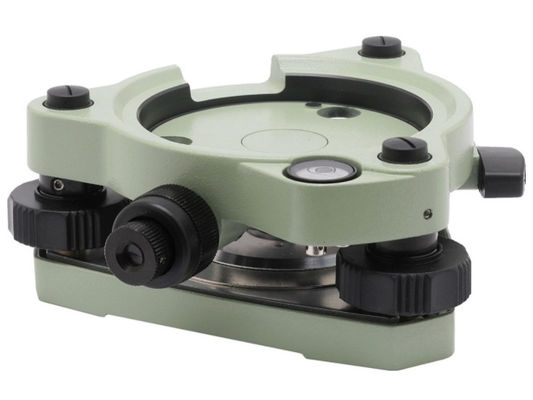
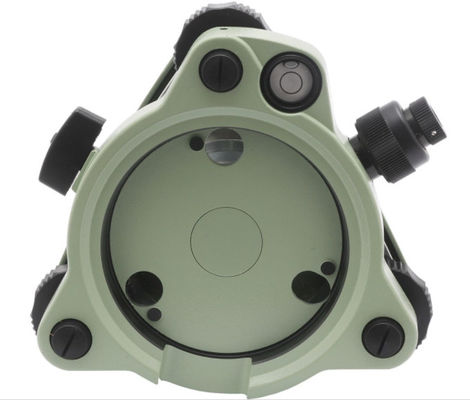
AJ10-D4 Green Tribrach with Optical Plummet Topcon Type for Total Station Prism GNSS


| Place of Origin | China |
|---|---|
| Brand Name | Leosurvey |
| Certification | ISO |
| Model Number | AJ10-D4 |
| Minimum Order Quantity | 5 Pieces |
| Price | 30USD~35USD |
| Packaging Details | Box and Carton |
| Delivery Time | 3-5 work day |
| Payment Terms | T/T |
| Supply Ability | 1000 pieces per month |
Product Details
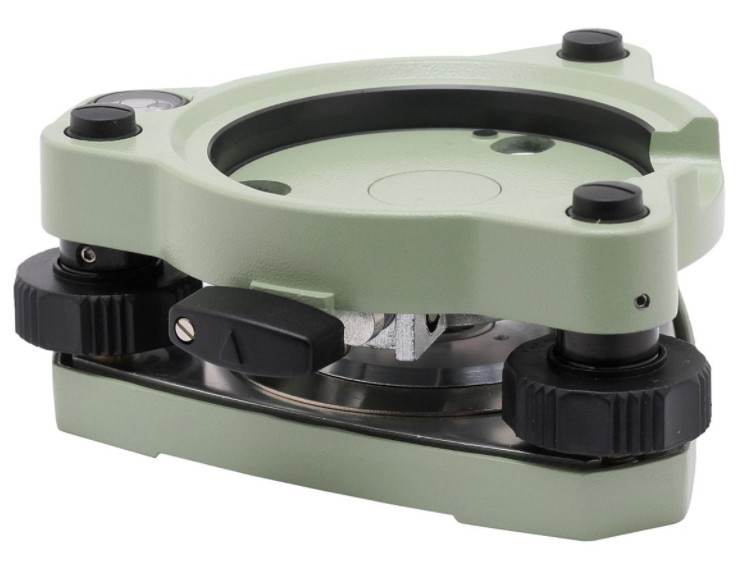
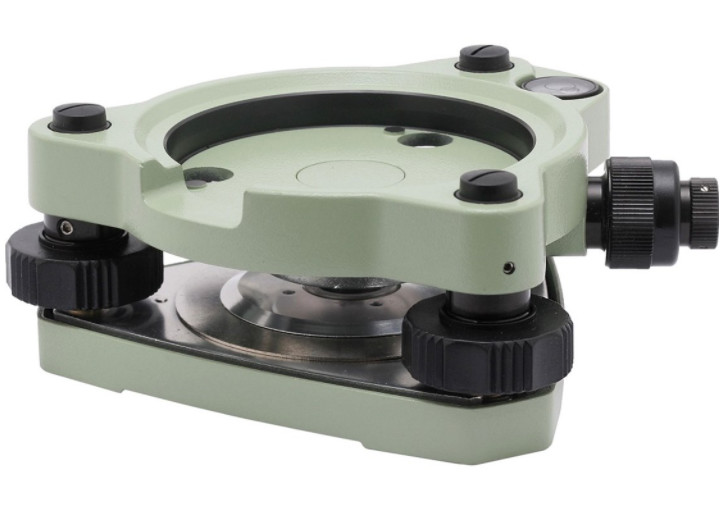
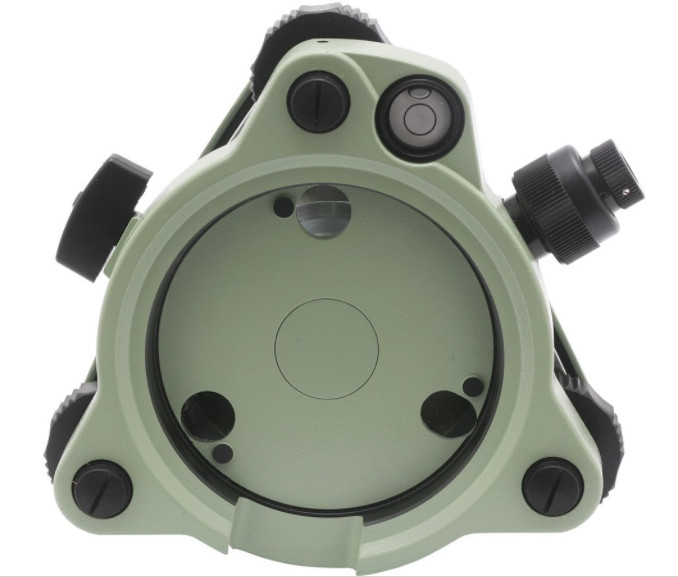
| Material | Aluminum | Color | Light Green |
|---|---|---|---|
| Type | Topcon | Optical Plummet | Without |
| Weight | 870g | Accuracy | Torsional Stiffness <2" |
| Bubble | 8' Circular Bubble | Used For | All Survey Instruments |
Product Description
AJ10-D4 Green Tribrach with Optical Plummet Topcon Type for Total Station Prism GNSS
Model: AJ10-D4
Specifications
| Model | AJ10-D4 |
| Color | Light Green |
| Optical Plummet | Yes |
| Weight | 670g |
| Material | Aluminum |
| Package | Individual Box Package |
| Accuracy | Torsional stiffness <2" |
| Type | Survey Instrument Accessory |
| Bubble | 8' Circular Bubble |
| Used For | All motorized instruments |
Highlights:
- 2.5X magnification
- Standard 5/8" x 11 base plate
- 8-min circular vial
- Three-prong forced centering
- Focusing range of 1.5 to 50 feet
- Leveling screws with center line
- Compatible with total stations, theodolites, reflector systems, and more
How do I use a laser plummet?
You can make measurements with a laser plummet by taking the following steps:
· Rough-set the tripod over the point by moving the legs in or out on the ground.
· Securely attach the laser plummet to the tripod.
· Turn on the laser plummet by pressing the appropriate button.
· Look at the point you want to set the instrument over, and pay attention to where the laser dot is in relation to the point.
· Determine the direction the laser dot needs to move to get over the point.
· Rotate the instruments leveling screws to center the laser dot exactly on the point.
· Adjust the tripod legs up or down to center the bull’s eye bubble on the instrument, but make sure you do one leg at a time.
· Make sure the laser plummet dot is still on or close to the point.
· Use the leveling screws to center the bubble exactly on the instrument.
· Slightly loosen the instrument’s attachment clamp on the tripod.
· While looking at the laser plummet dot, slide the instrument until it’s exactly on the point. But make sure you don’t rotate the instrument.
· Tighten the attachment clamp, and double-check the level.
Make sure you re-level and repeat as necessary until the instrument is exactly level and over the point.
Tribrach Adjusting
Optical Plummet Adjustment Using: Tribrach Adjusting Cylinder or Tribrach Adjuster
EQUIPMENT NEEDED: Tribrach Adjusting Cylinder or Tribrach Adjuster, Tripod or instrument stand, 2 tribrachs, target
1. Place the tribrach on the tripod. Put the adjuster in the tribrach. Place the tribrach to be adjusted on top of the adjuster so that it is upsidedown looking at the target on the ceiling. The distance between the tribrach and target should be between 4 and 5 feet.
2. Using the leveling screws of the bottom tribrach, point the crosshair of the tribrach being tested to coincide with the target.
3. Rotate the tribrach being tested 180 degrees on the adjuster. Crosshairs will stay on the target of an adjusted tribrach.
4. After 180 degree turn if the crosshair does not stay on the target, half the error should be corrected with the adjusting screws provided by the manufacturer of the tribrach. The remainder should be corrected with the leveling screws of the bottom tribrach.
5. Repeat steps 2, 3 & 4 until the crosshair stays on target at all positions.
Tribrach Circular Vial Adjustment Using: Tribrach Adjuster
EQUIPMENT NEEDED: Tripod or instrument stand, Tribrach Adjuster and adjusting pins.
1. Place the tribrach on the tripod and fasten to the tripod.
2. Place the adjuster in the tribrach and level the tribrach using the vial on the adaptor. Ignore the circular vial on the tribrach.
3. To level the Adjuster: Point one end of the adaptor vial to any leveling screw and using that screw bring the vial to center.
4. Now turn the adjuster 90 degrees so that each end of the vial is as close as possible to the other two leveling screws. Using these two leveling screws, center the vial.
5. Turn the vial 90 degrees back to the original leveling screw and level again if necessary.
6. Repeat 1,2 & 3 until the vial remains centered at both positions.
7. To test the adjustment of the adjuster vial at any centered position, rotate the adjuster 180 degrees. The vial should stay centered within one graduation. If not, take half the error back to the center with the vial mounting screw that is on the high side.
8. If the circular vial on the tribrach is not centered, use the adjusting screws and bring to center.
![]()
![]()
![]()
Recommended Products